
A pool pump shaft seal keeps pool water in—and out of the pump motor. When this little seal fails, you’ll spot water dripping below your pump (or sometimes pouring out during a cycle). Many Arizona homeowners in Queen Creek, San Tan Valley, Gilbert, and Mesa face frequent pump usage—meaning shaft seals are high-wear items here. Luckily, with a set of basic tools, a new shaft seal, and a free afternoon, you can get back to leak-free pool days. Let’s dive in!
What is a Pool Pump Shaft Seal, and Why Replace It?
A pool pump shaft seal (sometimes called a mechanical seal) prevents water from sneaking out along the spinning motor shaft. When it fails, you often see water leaking between the motor and pump housing, sometimes pooling where the pump sits.
Ignoring a bad shaft seal means:
- Wasted water (and higher bills)
- Rusted pool pump motors
- Possible electrical issues in the motor
- Risk of needing a full pump replacement down the road
If you start to see leaks or hear odd noises, it’s time to swap that old seal for a fresh one. In Arizona’s intense heat, catching leaks early—and acting fast—can save hundreds in repair bills.
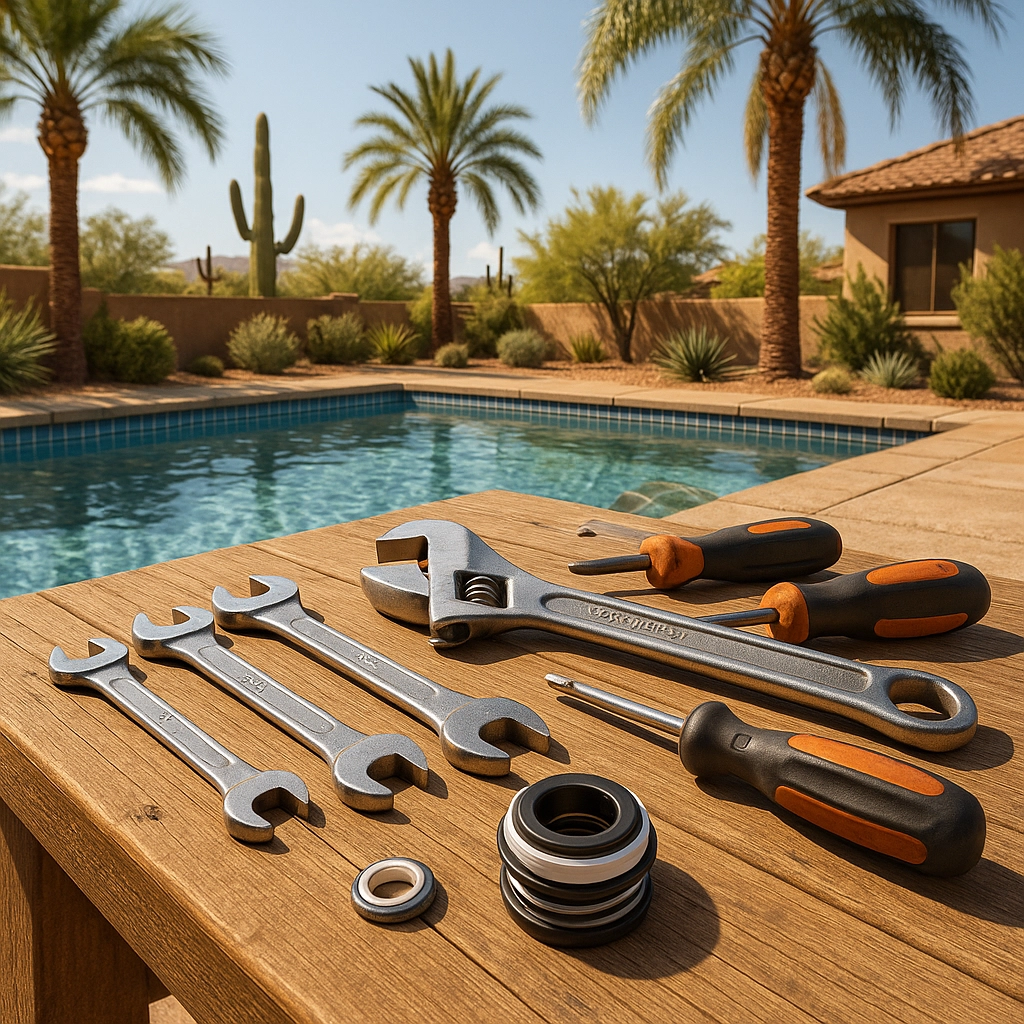
Tools, Parts, and Prep
Prepping right is 90% of DIY success. Here’s what you’ll need:
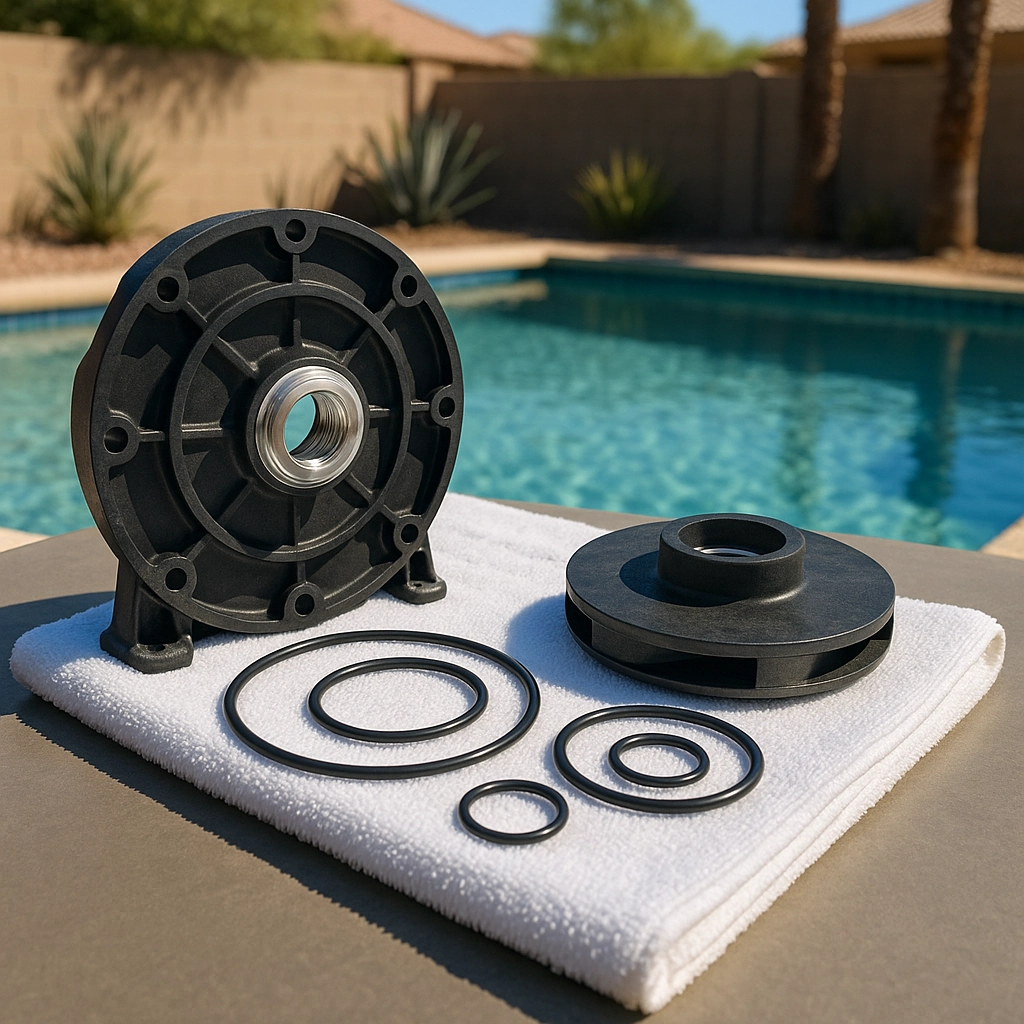
- New shaft seal (order one based on your pump’s model number—brands like Hayward, Pentair, or Sta-Rite all use slightly different seals)
- Phillips and flathead screwdrivers
- Wrenches or socket set
- Towels
- Silicon-based lubricant (if replacing O-rings)
- Clean rags or paper towels
- Small container for loose screws
- Camera or notepad (snap pics as you go!)
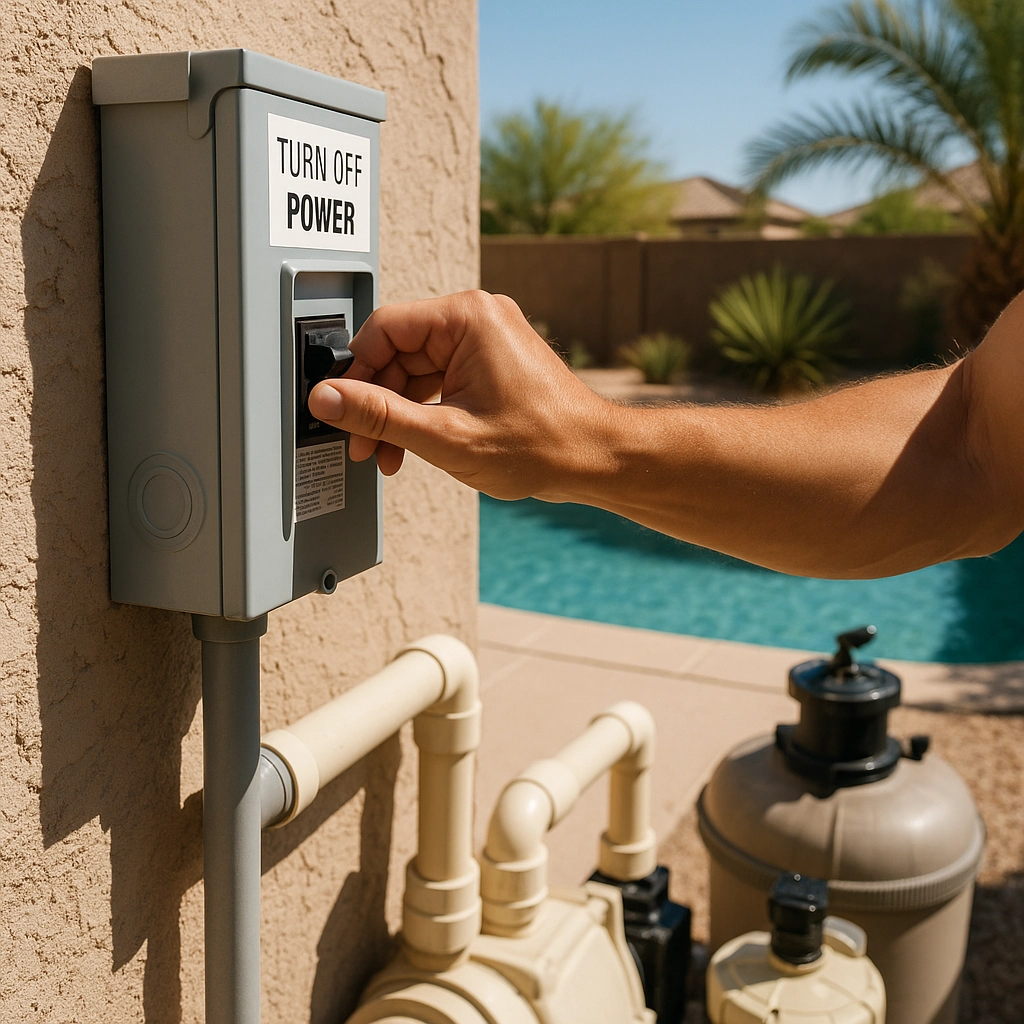
Important: Always shut off power at the breaker—not just the timer switch! Water + electricity = major safety hazard.
Pro Tip:
Pick up a shaft seal from a reputable pool supply store or an electric motor shop in Mesa, Chandler, or Gilbert. Bring your old seal or write down your pump’s brand/model for perfect fit.
Step 1: Shut Down and Disconnect
- Turn off all power to the pump at the circuit breaker.
- Close pool valves (if possible) to avoid water flowing when the pump is open.
- Open the pump basket lid and remove any debris.
- Loosen unions or disconnect plumbing (if your set-up allows) to make the pump easier to work on.
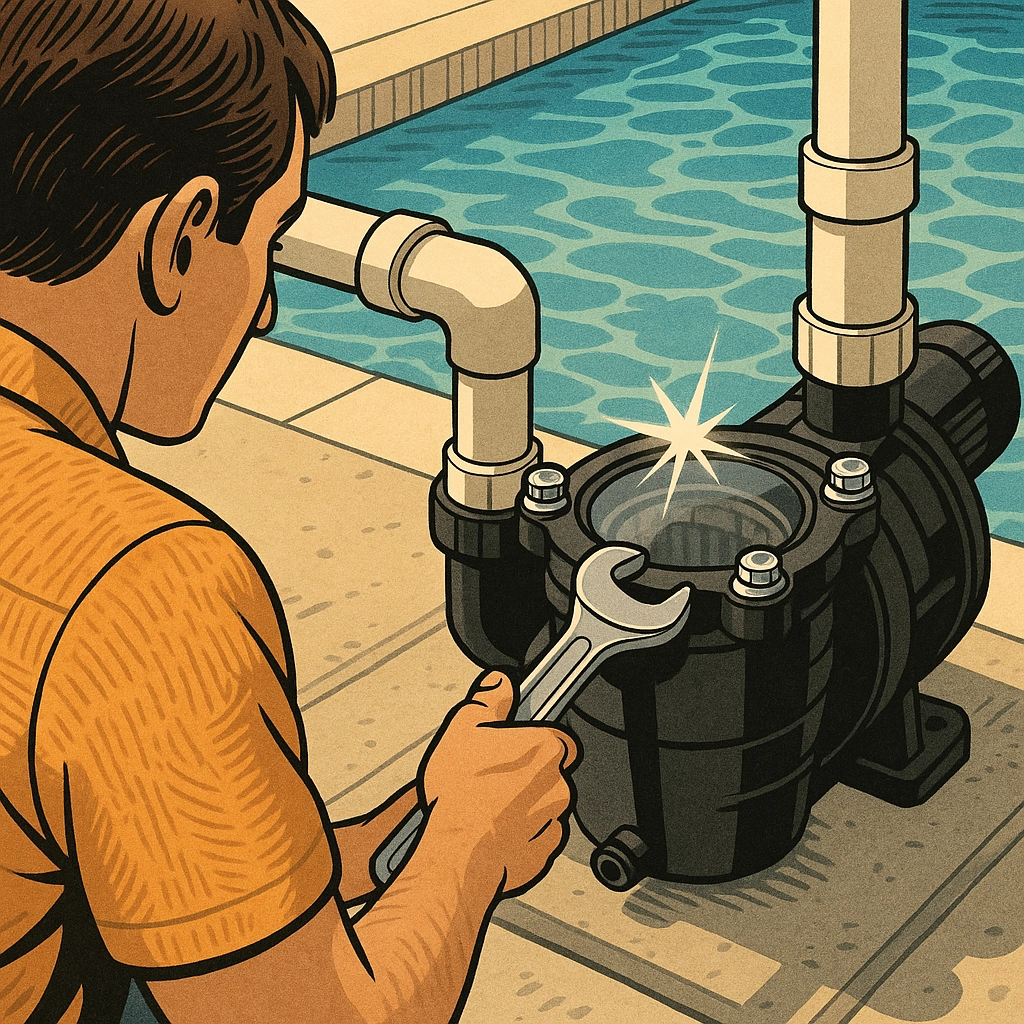
Step 2: Remove the Pump Housing
- Locate the clamp band around the seam between the motor and wet-end housing, or remove the 4–6 bolts holding the pump together.
- Gently wiggle the motor/pump assembly away—be patient, some old o-rings can be sticky.
- If you see an O-ring or rubber gasket between the pump and motor, set it aside for inspection/replacement.
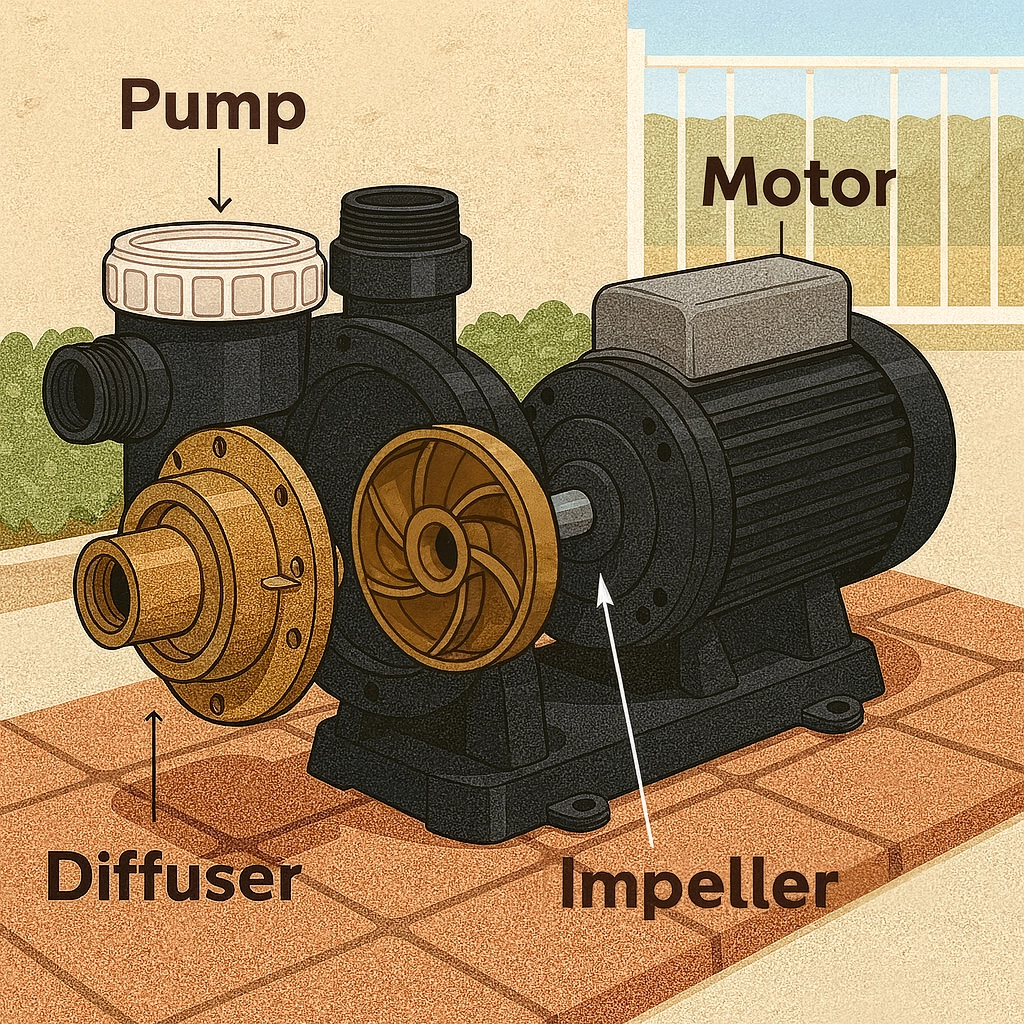
Step 3: Access the Impeller
- Remove the diffuser (the plastic piece covering the impeller—this usually lifts off or is held by small screws).
- With the impeller exposed, check for debris, buildup, or damaged parts.
- Hold the rear shaft of the motor still. On many pumps, you’ll need to remove the small rear cover (end cap) from the back of the motor (using a nut driver or screwdriver).
- Tip: Many pool motors have a slot for a flathead screwdriver on the back end of the shaft. Use this to hold the shaft steady.
- Unscrew the impeller by hand (it’s usually threaded onto the shaft—counter-clockwise to remove). If necessary, hold the shaft at the back with a wrench while loosening the impeller.
Step 4: Remove the Old Shaft Seal
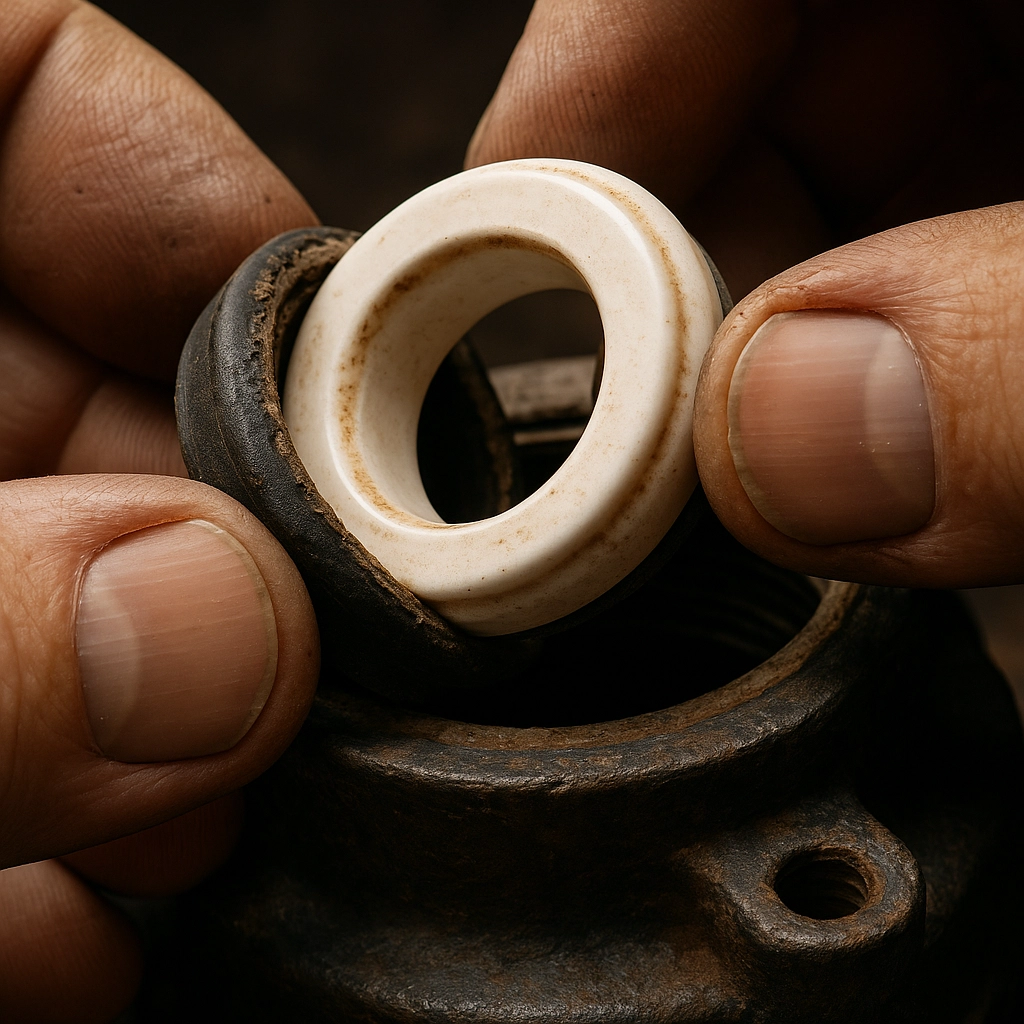
A pool shaft seal is two pieces:
- The ceramic “donut” in the pump side (seal plate)
- The shiny spring-loaded ring on the impeller
- Remove the seal plate: With the impeller off, locate the white ceramic part in the pump side (it may need gentle tapping with a screwdriver from the back to pop it out).
- Remove the spring-loaded half: Slide the spring side off the impeller shaft. Watch the order—snapping a before/after photo is a great idea.
- Inspect the impeller shaft and seal plate hole. If you see any old crimped metal from the seal, gently pry it off.
Step 5: Clean Up the Workspace
This area must be spotless—any grit, dirt, or oily fingerprints reduce new seal life.
- Wipe the pump seal plate, housing, and impeller with a clean, dry rag.
- Remove all scale, algae, or build-up.
- Inspect O-rings and gaskets for cracks or flattening—replace if suspect.
Cleanliness is key! Even a fingerprint can cause the shaft seal to leak prematurely.
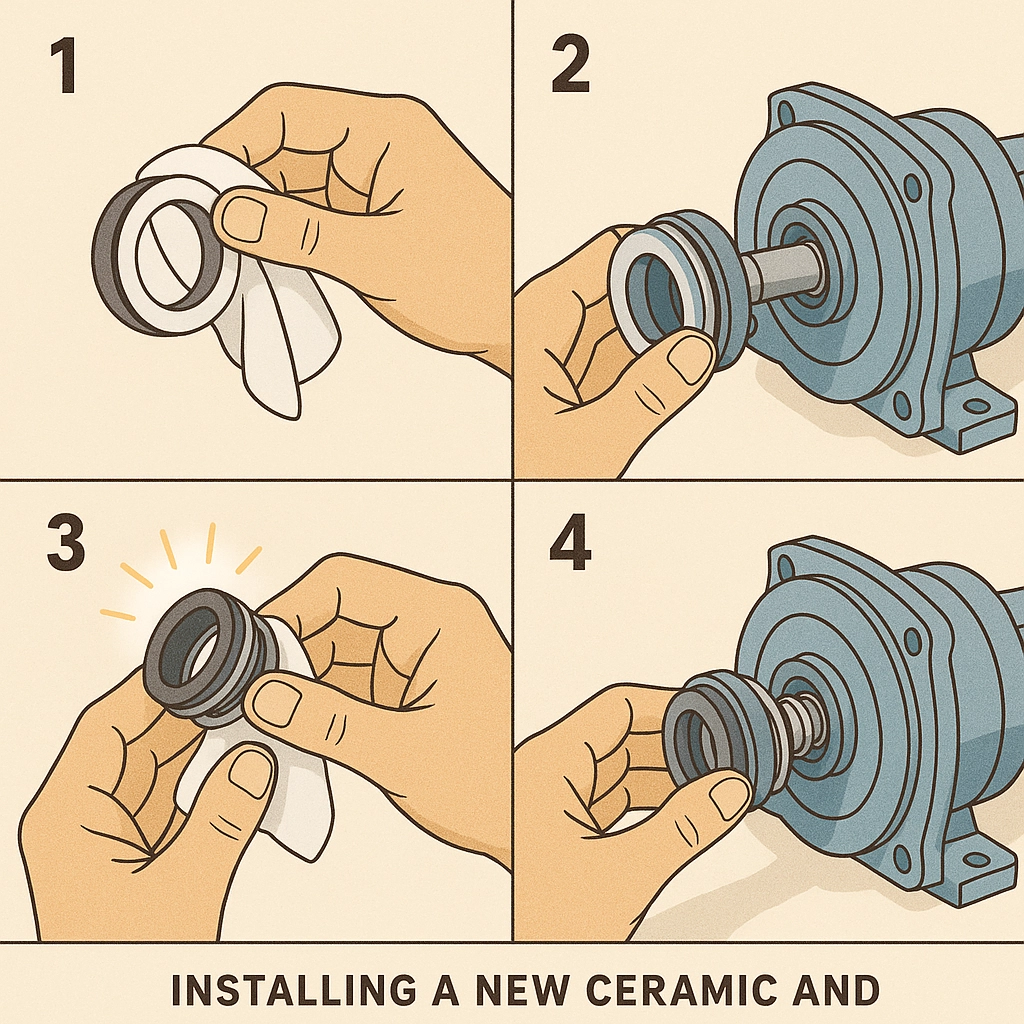
Step 6: Install the New Shaft Seal
This can be the trickiest bit, but slow and steady wins.
- Take the new ceramic ring (donut) and, using the supplied cardboard piece or a clean towel, press it evenly into the seal plate/housing. The shiny ceramic face should seat flush and clean.
- Never touch the polished surfaces with your fingers. Oils shorten seal life.
- Slide the new spring-loaded (rotating) portion onto the impeller shaft, black rubber facing the impeller, shiny face out.
- Double-check orientation: Many DIYers install this part upside down—refer to your photos or manual!
- If you’re replacing any O-rings, rub a light smear of pool-lube on them so they seal tightly without pinching.
Step 7: Reassemble the Pump
- Thread the impeller back onto the shaft—hand tight is enough (overtightening can crack it).
- Replace the seal plate onto the motor, lining up tabs or notches.
- Put the diffuser back on (ensure the gasket is seated correctly and lubricated).
- Bring the motor/seal plate assembly back to the pump housing.
- Secure all bolts or clamp bands—tighten evenly in a crisscross pattern to avoid leaks.
- Double-check all electrical connections are dry and clear of pool water.
Step 8: Fill, Prime, and Test
- Open all pool valves.
- Fill the pump basket and housing with clean water to prime.
- Screw the pump lid on tightly and make sure O-rings are seated.
- Restore power at the breaker.
- Turn the pump on and watch for leaks over several start/stop cycles.
If everything was lined up right, your pump should run quietly and leak-free again. Monitor the area over the next few days—if you see drips, check for loose bolts or misaligned seals.
Troubleshooting: Common DIY Pitfalls
- Still leaking after new seal? Double-check O-ring positioning, impeller orientation, and confirm the shaft seal matches your pump brand/model.
- White powder around the seal? That’s leftover from the ceramic face—normal at first, but wipe away after your pump’s run for a day.
- Humming or slow priming? Something else (like a failing motor bearing) could be causing issues. If it’s not a simple fix, call a certified technician.
When Do I Call the Pros?
DIY pool repairs save cash—but if you run into rusted bolts, corroded motor windings, or multiple leaks, it’s smart to call experts. At Complete Aquatic Solutions, we help homeowners in Queen Creek, San Tan Valley, Mesa, Gilbert, and Chandler extend pump life with professional, no-mess repairs. If tackling it yourself feels overwhelming, let us take over—saving your weekend for actual swimming!
Let us know if you need local service or help with tricky repairs—start here.
Pro Maintenance Tips for Arizona Pools
- Inspect every season: Arizona’s climate means seals can dry out and crack much faster.
- Check for water chemistry balance: Bad water chemistry can shorten seal and gasket life.
- Run your pump in the cooler hours: Hot surfaces stress plastic and rubber parts.
- Listen for noise: Early-warning signs are squeaks and rattles.
Want Pool DIY Success Year-Round?
At Complete Aquatic Solutions, we’re all about empowering homeowners across Queen Creek, Gilbert, Chandler, Mesa, and San Tan Valley. Check out our advanced maintenance guide for more smart pool owner tips!
Got questions or want to book a professional pool pump repair? Contact us here and we’ll help you protect your investment—so your Arizona pool stays cool, clear, and fun, all year long.
0 Comments